


86.2K Subscribers
129 Videos
6.6M Views


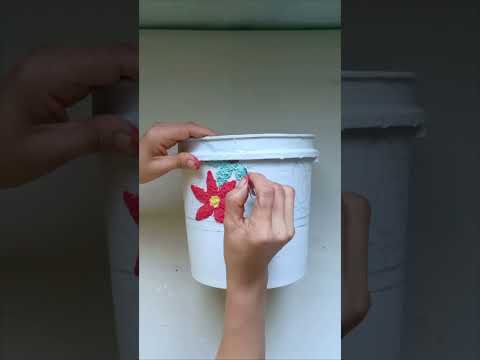
Few months ago I tried my hands at creating bonsais. I created four bonsais jade, bougainvillea, jasmine, and ixora out of which only three survived. Ixora died because it was a wrong selection of the plant to create a bonsai. But I think three out of four was a good result for the first timer like me. I had started jade in the last week of September and just in two-three months it started looking a lot like bonsai. But its pot was quite boring so I decided to give it a makeover. After all, if your bonsai takes the shape of real bonsai its pot should look like a pretty bonsai pot too.
Tip: Jade is the simplest plant to start with if you too wish to create a bonsai.
Gosh!! I talk a lot. Now let’s start the tutorial without much ado.
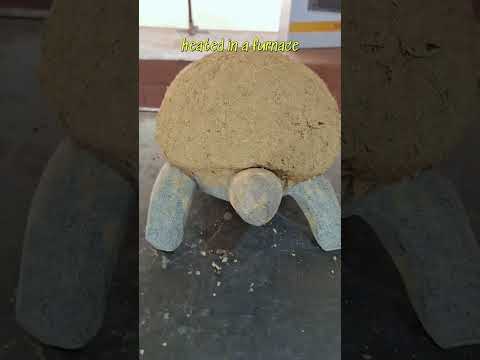
For the DIY enthusiast like me acrylic colours, white M-seal(epoxy clay) and clear varnish are quite versatile art & craft supplies. You just put on your thinking cap and there are numerous things you can make using these three simple supplies. In this DIY tutorial, we are going to use the same supplies.


Here's the outcome of my 15-day watercolor journey, which I started on March 1st and ended on March 15th. To simply say that I enjoyed the experience and gained knowledge would be an understatement. During this time, I not only developed a fondness for the medium but also committed to daily practice. Throughout these fifteen days, I have seen significant improvement, I learned that imperfections aren't bad at all, you just need to learn how to embrace and work with them. Connecting with talented artists from around the world and inspiring other art enthusiasts to start their own sketchbook journey was the icing on the cake. The next series will begin soon but first, I have a lovely DIY to share with you all. Stay Tuned Peeps!!! #watercolorforbeginners #watercolor #artistsoninstagram #artist #Sketchbook #sketchbookideas #easyart #art
Ready to kick stress and depression to the curb? Dive into our latest blog post where we spill the beans on activities that are your ultimate mood boosters! Read the full article now:
The end of 2023 marks the culmination of my 13-year journey in content creation. These years have not only transformed me personally but also professionally. Originating from a small town with a humble background, I was initially a shy, introverted individual with no exposure to city life until I moved to Indore for higher studies. Despite not having everything handed to me, I diligently worked for every achievement. My blogging journey began in October 2010, even though I was unfamiliar with the concept at the time. The first brand deal came in 2013, as my blog gained prominence on Google. Initially inexperienced, I struggled with basic tasks like creating invoices and communicating with brands and PR agencies. However, being a dedicated learner, dreamer, and doer, I gradually gained confidence by self-teaching. Brands encouraged me to establish a social media presence, leading to further success. Starting with three-figure earnings, my blogging income soared over the years, culminating in a seven-figure international deal in 2017. This journey not only witnessed financial growth but also a remarkable boost in confidence, allowing me to confidently accept invitations, such as attending IKEA's annual event in Sweden. After 13 years, I now possess rich experience, abundant confidence, diverse skills, a small business, an Indian folk art coloring book in my name and countless dreams. Despite numerous challenges, I persevered, always maintaining belief in myself. I continue moving forward because I am a Dreamer, Learner, and Doer. Thanks to you all for always encouraging me to do better. Wish you a wonderful year ahead! . . #2023achievements #2024newyear #NewYearNewBeginnings
Some "Perfect for Everyone" kind of holiday gifting ideas on the blog today. https://designdecoranddisha.com/celebrate-indias-rich-folk-art-introducing-two-stunning-products-for-holiday-gifting/ #HolidayGifts #holidaygiftingideas #holidaygiftideas #uniquegifts #giftsforalloccasions #giftboxes #giftideas2023
*New Video* https://youtu.be/OKHLVkY_bZY?si=FqtAFgzMrGhfjNB3 Share with your friends who love the combination technology and aesthetics.
Offers and New Launch!!! The Indian Folk Art Coloring Book is currently offered at a reduced price (It's the best and the lowest price). Additionally, if you're searching for holiday gift ideas, we've recently introduced the "Spark Your Senses" gift box, also available at a discounted rate. OFFER IS VALID TILL 24th DECEMBER Check out the link below: https://designdecoranddisha.com/shop/
Would you like to know How I created and self-published my first Indian Folk Art Coloring Book? Well, I just published a blog and shared my entire experience of self-publishing the coloring book. Do read it and let me know if you have any questions. I would be happy to help. https://designdecoranddisha.com/unveiling-my-first-adult-coloring-book-indian-folk-art/
Last call to place a pre-order for the Indian Folk Art coloring book which is being released tomorrow on 18 November 2023 Pre order has several benefits so don't miss the chance. You still have several hours to avail the offer :) Hurry Up!!! https://designdecoranddisha.com/product/indian-folk-art-adult-coloring-book-1/

In 2018, I got an email from Google stating that my English channel "Disha Mishra...

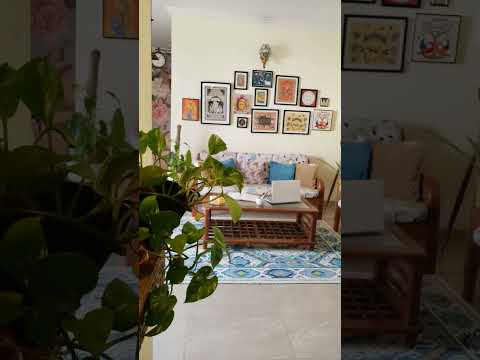
Watching home tours on Youtube is my favorite activity when I want to get inspired....

My year 2022 in a nutshell. I have been meaning to post this 2022 recap...

My take on Zomato, blinkit and Netflix trending wordplay billboard marketing. Everyone's going bananas over...


2 Responses
U r amazing creator & awful teacher. Both are god's gifts. So fulfill Ur aim of life..
Looking beautiful.. good work